How to create a video and embed it in a SharePoint page
Embedding Videos in a SharePoint Page
Purpose
Use this resource to learn how to create a video using your web cam and embed it in a SharePoint Intranet page for distribution.
- Create Video
- Edit Video
- Embed Video in a SharePoint Page
Process

Instructions
Create Video
Create Video
- Open Document Library - navigate to the document library where your video will be stored.
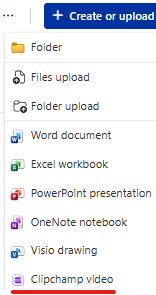
- Launch Video Editor - in the top right, click on "Create or Upload". Select "Clipchamp video"
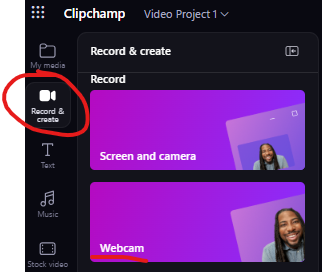
- Record with Webcam - on the left navigation pane, select "Record and create" to open and then select "Webcam".
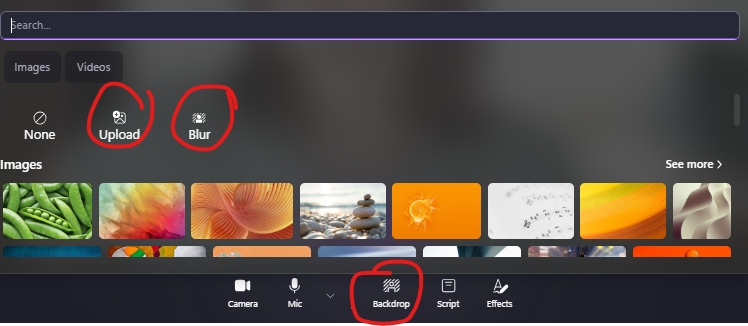
- Set Backdrop - select on the backdrop button to blur or upload a background image (or choose an existing image from the library).
-
- Start Recording - select start recording to begin.
- Don't stop if you stutter or don't like what you said. Just keep recording! During the edit process, you can delete the cuts before and after your desired content.
- Include long gaps before you start talking and after you end talking during your message. This will help during the edit process.
- Look into the camera during these times. This will provide transition time before you clip out the beginning and end pieces to create a polished end result.
- Stop Video - when complete, click the stop video button.
-
- Save and Edit - click the save and edit button to finalize your video, or retake if you prefer.
-

Edit Video
Edit Video
- Trim Off Ends - play your video and pause where you want to trip. Then click the scissors icon to make a section cut.
- Alternately, use the slider to move directly to the section you want to cut and lick on the scissor icon.
-
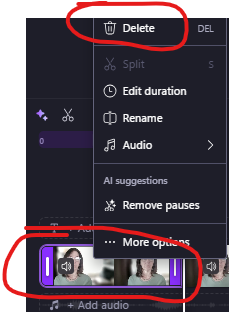
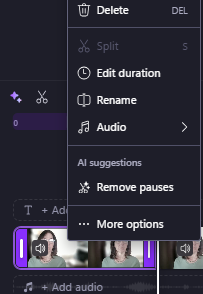
- Delete Video Sections - select on the section to remove and click the Delete key on your keyboard (or right click > Delete).
- Do the same for the beginning and end sections.
-
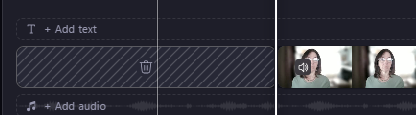
- Delete Gaps - delete the gap that now remains in the section by hovering over it and clicking on the trash can icon.
- Export Video
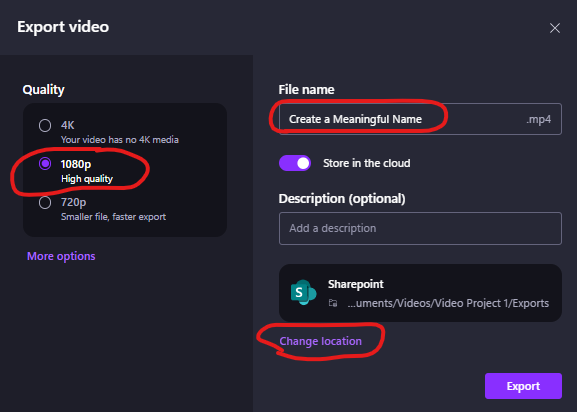
- Create a meaningful name - the name is seen on the SharePoint page
- Quality = 1080p
- Save to the SharePoint > Document Library folder where you want the file to be saved to.


Embed Video in a SharePoint Page
Embed in a SharePoint Page
- Open Page - navigate to the SharePoint page you want to embed your video in, and start an edit session.
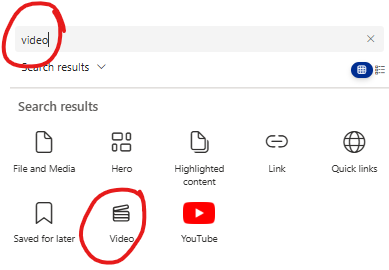
- Embed Video - on your SharePoint page, add the "Video" web part into your desired location.
-
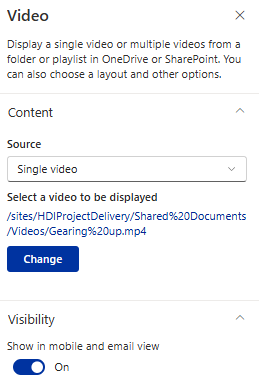
- Choose Video - navigate to the Document Library folder where you saved your video and select it.
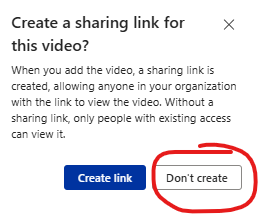
- Don't create a sharing link so that the video is only viewable by HDI employees
- Visibility - ensure Show in mobile and email view is turned on.